How to Paint Cabinets – Kitchen or Bathroom
Do you want a quick tip on how to paint cabinets? A slap of paint here and there will do wonders!
Even if you really hate doing DIY projects, or think they are all far too difficult, painting cabinets is the easiest place to start and something you can accomplish by yourself – no need for professionals!
First, it’s important to note that, though this venture seems strictly kitchen or bathroom-based, doesn’t guarantee that the remainder of your home won’t feel the resonant effects of this pseudo remodel. Painting your cabinets is an incredibly time consuming project though, and will obviously detract from the time you would be typically spend performing other duties around the house.
To get it right however, you will need a little planning on your part and more importantly, the right equipment. Now, let’s dive in and find out how to paint your cabinets, whether they are for kitchen or for bathroom.
Cleaning Your Cabinets Before Painting Them
You may be wondering can you just paint over cabinets? The answer is, not really unless the cabinets are clean. The cleaning process depends on the type of cabinet you have. Is it natural wood, painted, metal? Painted and metal cabinets can withstand more scrubbing than natural wood, but do pay attention to the cleaner you use on painted and natural wood cabinets.
For normal spills and drops you can simply use warm soapy water for dishes to wipe up the spill. Weekly you can use warm water with some dawn or some other mild degreaser in it will wash the areas that are closest to your stove where they get splattered with grease. Just be sure to read the labels of the cleaners to make sure they are good for wood or paint.
Cleaner choices
There are many cleaners on the market, multipurpose cleaners, degreasers, and more. Which should be used on natural wood? For natural wood you want something that is not too harsh but will cut through grease and grime. Murphy’s Oil Soap is the number one choice, but there are other all natural cleaners out there. There is also Guardsman, and of course the Amish Dutch Glow.
For painted surfaces, warm water and an all-purpose cleaner can be used. Once you rub the cleaner in and loosed the grime and grease, take a clean cloth and plain warm water to rinse off the cleaner. Then dry with a soft cloth.
For metal, you can use the same all-purpose cleaner as on painted surfaces, rinse, and dry.
After cleaning
After you have cleaned and dried your cabinets, polish them. Use furniture polish, spray it on a soft cloth and then rub it on in circular motions. Follow that by buffing it with a clean soft buffing cloth. Work on one section at a time with the furniture polish. This will help keep the grime and grease from building up and also give your cabinets a beautiful shine.
Homemade cleaners
You can mix white vinegar with warm water, 1 cup each to scrub kitchen cabinets. For a beautiful shine, add a few drops of olive oil. You can also citrus oil to make it smell nicer.
Baking soda paste, mix enough water with baking soda to form a paste. Dip your cloth in the paste and work on hardened spills with this solution. It will not hurt your wood.
Things to remember when cleaning your cabinets
Remember always read labels to make sure the product you are going to use are safe for wood.
Daily wipe downs with warm soapy dish water in areas that are closest to areas that you cook, will go a long way to keeping the build of grease and grime to a minimum which keeps you from having to scrub so hard.
Once every few months wash down the entire kitchen cabinetry with warm soapy water, dry and apply polish again.
A couple times of years do a deep clean with something like Murphy’s Oil Soap and then polish again.
How to Paint Your Cabinets – Next Steps
Remove all fixtures, fittings and doors
For some, it may already be common knowledge, but it bears mentioning that painting should be completed with your cabinet doors removed. It may seem less convenient, but it truly does make them easier to work with, from the sanding all the way to the painting stages. When taking down your cabinet doors, it’s best to number them using a method that makes it convenient for you to remember where each door returns to when the work is finished. This may not seem necessary when you begin, but will certainly save you much frustration when attempting to reconstruct the large puzzle that is now your disassembled cabinetry.
Sanding
This is one of the more time-consuming jobs in the process. You will need to sand down the whole vanity cabinet. You can use a sander to complete the doors outside – less dust that way – while inside, consider regular sandpaper. Try to get most of the paint off, not always that easy to accomplish in the corners and curves of the cabinet. Don’t worry if you cannot get everything off. You basically want to rough up the surface to allow the primer to take to the wood surface. Once you have sanded everything, make sure you clean away all the sawdust.
Drop Cloths and Painter’s Tape
Naturally, it’s beneficial to tape off and cover any of the items in your kitchen or bathroom that you want to protect from paint: the insides of the cabinets, your major appliances, the countertops, floor, perhaps even some of the ceiling. You may also wish to set up a barrier between your space and open areas of your home as well, to avoid spreading harmful paint particles around the house. This can be achieved by hanging a drop cloth or tarpaulin.
Apply the primer
A good wood primer is essential as your first coat. This will penetrate the wood, helping to seal it and acts as a base layer for the colour you have chosen. Now allow the primer to dry. Once it has, check the vanity cupboard thoroughly for any drips or primer that may have run. Lightly sand these down if you find any.
Final Step – How to Paint Cabinets Like a Pro
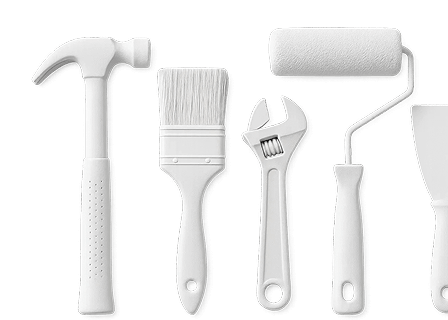
After the Primer has dried, it’s time to start painting. You can use any angled brush and a foam roller to apply the paint. First-timers can use latex-based paint as it is easier to apply when compared to oil paint. There are latex-based paint formulas that are made specifically for cabinets. Make small sections and work in those areas before using the roller for a smooth and uniform finish. Once the paint has dried, you can even consider applying a coat of satin polyacrylic for added durability.
How to paint cabinets with a sprayer
Spray paint takes less time and produces better results too. But it is best done in a dedicated workshop or you have the risk of overspray.
What kind of paint do you use on cabinets?
If you are unsure about the colour tone, then you can use design magazines for references or consult a designer for ideas. Both oil-based paints, as well as latex based paints, are available in a wide range of colours. Choose one that blends in perfectly with the countertop and the backsplash.
If you’re looking to how to paint cabinets and want to do it right, these are some important tips to remember, and ones that will make the task much less frustrating.
Additional Articles about Bathroom Vanities:
- Caring for your bathroom vanity cabinet
- Choosing the perfect bathroom vanity cabinet
- Should you consider DIY or use a professional
- Choosing the perfectly sized bathroom vanity
- How to install a bathroom vanity
- Getting the most out of your bathroom vanity storage space
- Choosing the correct top for your bathroom vanity
- Caring for a wooden bathroom vanity cupboard
- Bathroom vanity cabinet design trends
- Painting your bathroom vanity cabinet
