Thinking about renovating your home in 2025? Here’s a step-by-step breakdown of the entire home renovation process—from budgeting and design to construction and final inspections.
- Step 1: Plan Ahead Strategically
Define your renovation goals, timeline, and scope before starting any work to avoid delays and budget issues. - Step 2: Build a Realistic Budget
Set cost expectations early. Include design, labor, materials, permits, and a 15–20% buffer for unexpected expenses. - Step 3: Finalize Your Home Design
Align your lifestyle with functional design. Consult with interior designers and focus on layout and the right materials. - Step 4: Prepare for Pre-Construction
Organize drawings, permits, and timelines. Secure products with long lead times and establish payment terms with your contractor. - Step 5: Hire the Right Contractors
Vet fence installers, deck builders, and renovation contractors through referrals, reviews, licenses, and job site visits. - Step 6: Begin Demolition and Construction
Expect surprises in walls and wiring. Maintain open communication and closely track project progress. - Step 7: Tackle Electrical and Structural Work
Upgrade systems to meet current local building codes and support your updated floor plan safely and efficiently. - Step 8: Improve the Exterior and Curb Appeal
Install new fences, decks, siding, and windows to enhance functionality and boost resale value. - Step 9: Add Energy-Efficient Solutions
Select HVAC, window, and insulation options that lower utility bills and enhance fresh air flow. - Step 10: Finish With Inspections and Maintenance
Clear final inspections, walk through the home carefully, and set up a long-term care routine for lasting results.
How to Plan a Home Renovation Project
Renovating your home isn’t just about paint swatches and Pinterest boards—it’s a strategy-heavy process that can make or break your investment. A successful home renovation begins long before the construction phase starts. It starts with a vision, a realistic renovation plan, and most importantly, a homeowner who’s willing to plan ahead. Whether you’re aiming for a whole house remodel or smaller home remodeling projects, starting with the right mindset sets everything in motion.
First, identify your “why.” Are you preparing your home for resale? Expanding your living space? Or is this your forever dream home you’re personalizing room by room? Once you’re clear on your goals, align your expectations with your budget and timeline. The average home renovation project in Ontario spans 3–6 months, with budget ranges starting from $15,000 for minor updates and escalating to $150,000+ for full overhauls.
Begin by assessing:
- Which rooms are essential to remodel?
- Are structural changes needed (like removing walls)?
- What’s the current condition of your plumbing, electrical, and insulation?
- Will you need a building permit?
Another common misstep? Underestimating the importance of clear communication with your contractor and designers. Homeowners who don’t define their goals early are the ones who face unexpected costs, delays, and design compromises. It’s also wise to understand your project’s scope: a cosmetic renovation differs drastically from a gut remodel involving demolition phase, rewiring, or adding rooms.
Key Tip: Always research online reviews, compare estimates, and ask for project timelines up front. A written scope with a payment schedule gives everyone clarity.
1. Budgeting for a Complete Home Remodel
Budgeting for a complete home remodel doesn’t begin with a ballpark guess or “what the neighbours paid.” It begins with data, priorities, and flexibility for unexpected costs. A proper budget defines your options, protects your investment, and informs every decision made—from selecting right materials to deciding whether or not to install hardwood floors in the living room.
Here’s what every homeowner should consider during the budgeting phase:
Key Budget Categories:
- Design and drawings: $2,000 – $8,000
- Demolition & disposal: $2 – $8 per square foot
- Plumbing electrical upgrades: $8,000 – $20,000+
- Flooring (incl. hardwood): $5 – $15 per square foot
- Windows & doors: $10,000 – $25,000
- Interior design services: 10–20% of the total budget
- Unexpected costs buffer: Add 15–20% of your total
Table 1: Average Cost Ranges by Remodel Scope (GTA 2024–2025)
| Project Type | Low-End Budget | Mid-Range Budget | High-End Budget |
|---|---|---|---|
| Small Renovation | $15,000 | $25,000 | $40,000+ |
| Mid-Size Home Remodel | $40,000 | $75,000 | $100,000+ |
| Full Home Renovation | $100,000 | $150,000 | $250,000+ |
Fence builders, fence contractors, and deck services are often budgeted separately. In the GTA, expect to pay $50–$85 per linear foot for premium cedar fences, while basic pressure-treated solutions start around $35. For decks, costs range from $25 to $60 per square foot depending on the material.
Don’t forget the soft costs: permits, design consultations, permit drawings, and potential hotel stays if your house becomes temporarily uninhabitable.
Important: It’s common to allocate a larger share of the budget to the kitchen remodel, but don’t let that take away from hidden essentials—like HVAC upgrades or water-proofing basements. These are the unsexy items that determine long-term durability and value.

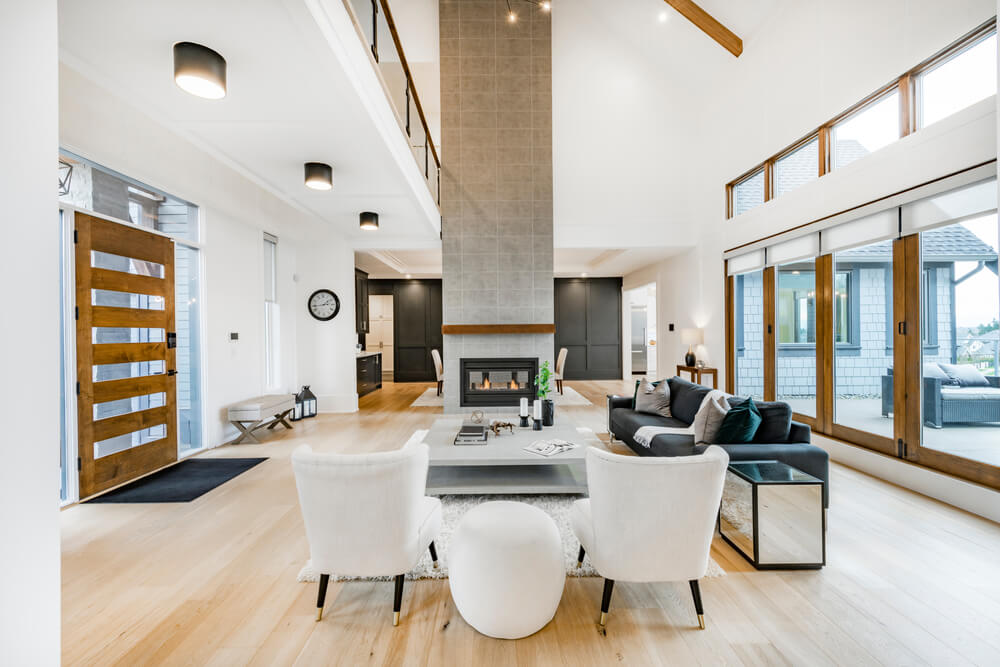
2. Design and Inspiration for a Dream Home
Design isn’t just aesthetic—it’s how your home functions, breathes, and adapts to your life. When we meet with homeowners, the first thing we ask isn’t about colors or finishes. It’s about lifestyle. Who’s living here? Do you entertain often? Are your kids growing? Will this be a dream home or a strategic investment? Your answers determine your layout, finishes, and the role of interior designers in your plan.
Trends in home renovation for 2025 lean heavily toward multi-use spaces, eco-conscious materials, and smart integrations. Think: reclaimed wood beams, matte black light fixtures, energy efficient windows, and open-concept layouts with hidden pocket doors for flexible privacy.
When it comes to brands, we often recommend:
- Benjamin Moore for long-lasting paint (low VOC options)
- Metrie for trim and interior doors
- Delta or Grohe for timeless plumbing fixtures
- Cambria and Caesarstone for engineered quartz countertops
And yes, Pinterest, Houzz, and social media platforms like Instagram are great for initial inspo. But don’t let pretty images fool you—always cross-check feasibility with your contractor. Some designs look great in a California loft but don’t work well with our Canadian winter layouts or code restrictions.
A successful design process also includes drafting detailed floor plans, requesting 3D mock-ups, and consulting your contractor before ordering any finishes. Interior design isn’t a last step—it’s integrated from the start to avoid costly mistakes and disjointed results.
And here’s where many homeowners go wrong: they invest in finishes without considering flow. For example, choosing ornate light fixtures in a hallway with no natural light can create an odd mood. Or selecting white cabinetry in a home with heavy pets can require more maintenance than you bargained for.
3. Pre-Construction Phase and Preparation
his phase is the quiet before the storm—the last chance to catch problems before the construction begins. A well-prepared home renovation project doesn’t leave things to chance. The demolition phase, contractor schedules, and even permits hinge on what’s done during pre-construction.
Start here: Organize your documents. Gather all blueprints, measurements, site surveys, and anything you’ve already agreed on with your design build firm. Every successful renovation project has a binder—or better, a digital file—containing:
- Building permit applications and approval timelines
- Engineering and architectural drawings
- Insurance documents and contracts
- Product selections and finish samples
- A room-by-room scope of work
Pre-construction also includes:
- Ordering long-lead materials (like windows or custom vanities)
- Booking specialty trades (some HVAC and framing crews book months ahead)
- Scheduling site access and temporary utilities
- Arranging pet or family accommodations if needed
Cost estimates can fluctuate here based on design tweaks, supply chain issues, or new code requirements. We often see homeowners adjusting their renovation plan slightly in this phase to reflect better products or faster timelines—especially when aiming for a successful home renovation that meets move-in deadlines.
Pay attention to your payment schedule now, too. Most contractors will set milestones tied to phases like framing, electrical, or flooring installation. Make sure they’re clear and tied to visible progress.
A final tip? Label everything before demolition phase begins—especially HVAC zones, plumbing shutoffs, and electrical panels. Save yourself the headache later.
At this stage, you’re not building yet—but the choices made here ripple across your entire home remodeling project.

4. Hiring Contractors for a Home Remodel
Hiring the right home renovation contractor is arguably the most important decision in your home remodel. Whether you’re adding a second story or doing exterior renovations, your project’s success hinges on the people running it.
Here’s how we recommend selecting a contractor or construction team:
- Start with referrals. Ask neighbours, friends, or local Facebook groups.
- Dig into online reviews. Google, Homestars, and Houzz give a good idea of customer satisfaction.
- Interview more than one team. Even if you like the first one, compare.
- Review recent work. Ask to visit an active job site, not just a gallery.
- Discuss project timelines and delays. Get honest about backlogs and trade availability.
- Ask about insurance and warranties. They matter more than you think.
For larger renovations, especially those involving structural changes, you’ll likely work with multiple contractors or subcontractors. That’s when hiring a general contractor or design build firm becomes a game changer—they manage scheduling, trades, and the communication that keeps your project runs smoothly.
Also, know the difference between fence installers and general carpenters. In regions like Southern Ontario, especially in suburban areas like Kitchener or Richmond Hill, specialty fencing company crews offer better long-term results than jack-of-all-trades handymen. The same rule applies for deck construction—use niche-skilled fence builders if possible.
5. Construction Phase and Demolition Phase
Once you’ve signed contracts, chosen your finishes, and gotten your permits in order, the construction phase finally begins. This is where your plans go from paper to reality—and where timelines, budget, and flexibility are tested most.
Demolition phase typically lasts 1–2 weeks for mid-size projects and involves gutting interior finishes, removing old framing, disconnecting plumbing/electrical, and clearing out debris. In older homes, we often uncover:
- Hidden mold behind insulation
- Asbestos in duct wrap or floor tiles
- Previous unpermitted renovations
- Outdated wiring and plumbing
These discoveries are one reason every home renovation project should include a contingency fund. We recommend setting aside 15–20% of your total budget for unexpected costs that pop up when walls come down.
Construction timeline varies based on project size:
- Small remodel (1–2 rooms): 2–4 weeks
- Whole house remodel: 3–6 months
- Structural changes + additions: 6–12 months+
Key to surviving this stage? Daily or weekly check-ins. We encourage homeowners to create a shared online spreadsheet or chat group where they can track:
- Day-to-day work progress
- Issues or delays
- Selections that need approval (e.g. grout color, light fixtures)
- Inspection status
If you’ve hired a project manager or GC, they’ll coordinate trades and keep the schedule on track. If not, you’ll need to chase plumbers, electricians, drywallers, and painters—each dependent on the other finishing on time.
Safety Tip: The home becomes a real construction site now. Keep children and pets away, and always wear shoes indoors. We’ve seen minor injuries happen when this step was overlooked.

6. Electrical Work and Structural Changes
When the renovation process reaches the stage of plumbing electrical and structural changes, the stakes become higher. These are the areas where your investment can either save money in the long term or cost you tens of thousands in future fixes or unexpected expenses. Upgrading electrical systems to current code isn’t just a safety decision—it’s a value driver, especially in homes built before 1990.
Most local building codes now require:
- Dedicated circuits for kitchen appliances
- GFCI protection in bathrooms and laundry rooms
- Hardwired smoke and CO detectors
- Arc-fault protection in bedrooms
- Proper breaker sizing for HVAC upgrades
If your current layout isn’t functional, this is when a new floor plan is finalized. Moving load-bearing walls or adjusting stairwells? Bring in a structural engineer. You’ll need detailed drawings and city approvals—don’t rely on assumptions.
At this stage, we install:
- Recessed lighting and modern light fixtures
- Sub-panels or service upgrades (common in full renovations)
- Smart switches and dimmers (aligned with home renovation trends)
- In-floor heating or low-voltage systems
- Rough-ins for home automation and EV charging
It’s also where project management becomes essential. With electricians, framers, and HVAC trades all onsite, work must follow a tight, efficient order. Deviating from that flow causes project progress to stall and increases the risk of cost overruns.
To keep everyone on the same page, ensure every detail—like ceiling heights, fixture locations, and outlet placement—is written down and signed off on.
7. Exterior Renovations and Home Improvement
Now that the inside is shaping up, it’s time to turn our attention outward. Exterior renovations aren’t just about aesthetics—they increase your home’s curb appeal, protect your investment, and improve overall efficiency.
Start with the basics:
- Roof replacement or repairs (especially if shingles are older than 15 years)
- Fencing company services, including new decks and gates
- Replacing outdated siding or painting brick
- Upgrading doors and windows for insulation and style
In Southern Ontario, homeowners often invest in fence installers to secure yards and increase privacy. Expect cedar or pressure-treated options to last 15–25 years, depending on upkeep and local climate. Aluminum and composite are growing in popularity due to durability and reduced maintenance.
Decks are also a focal point. A well-built deck not only adds lifestyle value—it improves your resale value dramatically. Trex and TimberTech are two standout brands for composite decking. These materials resist fading and require less maintenance than wood.
Some overlooked upgrades to consider:
- New eavestrough systems to protect foundations
- LED exterior lighting for security and ambiance
- Exterior faucets with frost-free features
- Awnings or covered porches to extend usable space
You’ll likely generate a lot of renovation debris at this point. Ensure your contractor manages disposal efficiently—don’t let bins overflow, especially during inspections or city walkthroughs.
The right building materials—paired with smart placement and finishes—will make your property stand out while weathering our intense winters and humid summers.
8. Incorporating Energy Efficiency
If you’re aiming for a successful home renovation in 2025, energy efficient design isn’t optional—it’s the standard. With utility costs rising and climate responsibility on everyone’s radar, this is the stage where you can lock in savings and future-proof your property.
Areas to target include:
- Triple-glazed windows with low-E coatings
- Spray foam insulation in walls and attics
- Energy Star-certified appliances
- Programmable thermostats and smart HVAC zoning
- Solar-ready roofs for future panel installs
Better insulation and ventilation also improve fresh air circulation, reduce mold risk, and keep heating and cooling systems from working overtime. It’s not just about saving on bills—it’s about enhancing indoor health and comfort.
The government continues to offer rebates through programs like Canada Greener Homes Grant. Speak to your contractor about current incentives before construction begins, as they often require pre-approval.
Make energy planning part of your early renovation plan, not an afterthought. It’s more cost-effective to install these features during a home remodeling project than retrofitting later. We’ve seen many homeowners invest in low-consumption HVAC or hybrid heat pump systems—great long-term investments, even if the upfront costs are higher.
In the long run, these decisions align with the ultimate home renovation guide principles: reduce waste, increase comfort, and save money where it matters.

9. Final Inspections and Completion of a Home Remodeling
The end is in sight—but it’s not time to celebrate just yet. Before you can fully enjoy your renovated living space, you must pass final inspections and close out every aspect of your home renovation project.
Depending on your city or region, inspections may include:
- Framing and insulation
- HVAC, plumbing, and electrical work
- Final occupancy check
- Site grading or drainage reviews
Every inspector will review compliance with local building codes and whether any work has deviated from approved plans. This is where detailed drawings again prove their worth. Having everything documented reduces stress, especially when a city official requests evidence of building permit approvals or materials specs.
Common reasons for failed inspections:
- Missing smoke/CO detectors
- Incomplete railing or stair installations
- Improper venting or ductwork
- Incorrectly installed electrical panels
Once cleared, your contractor should prepare a deficiency list (also known as a “punch list”). This identifies any final touch-ups—paint drips, crooked tiles, or minor hardware adjustments. Don’t submit final payment until all items are addressed according to your payment terms.
There’s a strong emotional release in this phase. You’ve lived through delays, surprises, dust, noise—and now, you get your dream home. Take a deep breath, walk through slowly, and make sure everything aligns with your expectations before signing off.
10. Maintaining the Home after a Home Renovation
The work isn’t over just because the tools are gone. Every successful renovation includes a maintenance phase. The care you put into your new features determines how long they’ll last and how well they’ll serve you.
Start with a seasonal checklist:
- Lubricate window tracks and inspect caulking
- Flush water heaters and change HVAC filters
- Inspect fencing and decks for rot or weathering
- Reseal tile grout and check plumbing for small leaks
Store your warranty documents and manuals in a safe place—digitally and physically. For appliances, register products online to extend coverage. If you’ve worked with multiple trades, keep each contact handy for future repairs or upgrades.
Don’t forget the importance of documenting your floor plan and systems layout. It helps if you ever plan another renovation, list the home for sale, or need emergency repairs.
Lastly, keep an eye on home renovation trends. The industry continues to evolve—especially with innovative solutions for ventilation, smart tech, and integrated home systems. Staying informed lets you plan upgrades before they become urgent, avoiding expensive emergency fixes later.
Enjoying the New Home With Kitchen&Bath
If you’re thinking about your own 2025 remodel, we at Kitchen&Bath are here to help you prepare smarter. Our experience shows that successful renovations come from informed planning, teamwork, and attention to detail. Whether you’re focused on expanding your living space, increasing your home’s curb appeal, or building smarter, more efficient systems, we’re here to help you navigate every phase.